.webp) pewpigame.com
pewpigame.comMaster Class Traversal: How to Flawlessly Route, Sequence, and Execute Every Level in Gugu Gaga Penguin
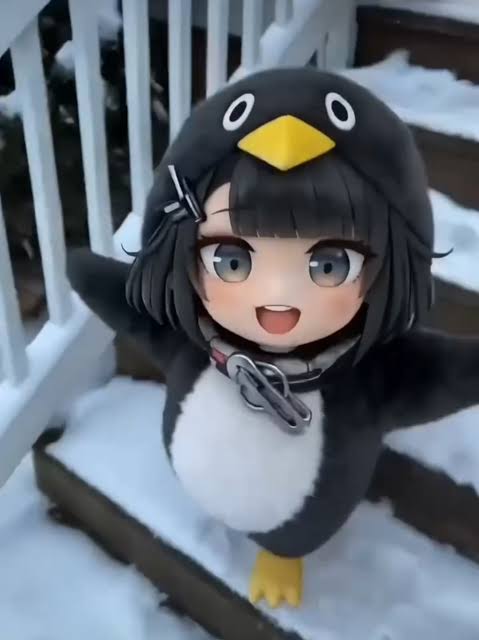
Gugu Gaga Penguin has cemented itself as a deceptively complex physics platformer where casual playthroughs contrast sharply with optimal movement execution. While novice players stumble through stages using standard walking and basic jumps, high-level mastery requires an intricate understanding of collision boundaries, momentum retention, and precise input sequencing. Mastering the mechanics demands more than fast reflexes; it requires a structured framework to convert basic character actions into an uninterrupted kinetic chain across every stage of the game.
This comprehensive operational guide details step-by-step instructions for executing high-speed traversal, managing momentum mechanics, and clearing high-difficulty obstacles. Arranged chronologically from pre-run setup through endgame perfection, each phase outlines exact input methods, environmental mechanics, and trajectory calculations to optimize your performance.
Phase 1: Configuring Settings and Inputs – How to Set Up Your Baseline Controls for Frame Consistency
Before attempting advanced movement techniques, you must configure your hardware and in-game control settings to ensure frame-accurate inputs. The game engine processes character physics based on tick rates tied directly to frame rendering. Running the game with erratic frame rates introduces input dropouts during multi-action combinations, particularly when chaining slide-drops into slope transitions.
To prepare your system, lock your display refresh rate to 120 Hz or 144 Hz in the display settings menu and disable all post-processing motion blur options. Rebind your primary action keys so that "Slide/Tuck" and "Jump/Flop" occupy separate, non-interfering inputs (such as shoulder bumpers on a controller or dedicated primary keys on a keyboard). This layout enables thumb stability while executing rapid directional switches.
Optimal Control Mapping and System Calibration
- Frame Rate Cap: Enable a stable 120 FPS lock to minimize tick-rate variance during input buffering windows.
- Input Mode: Toggle "Raw Input" to on, removing OS-level stick acceleration and software smoothing.
- Binding Separation: Map "Slide" and "Jump" to independent fingers to allow frame-overlapping commands without physical input delay.
Phase 2: Starting Line Launching – How to Perform the Instant Waddle-Cancel Acceleration
Beginning a run with standard forward movement forces your penguin into a gradual startup curve known as the "Waddle Acceleration Phase." This phase takes up to 2.5 seconds to reach baseline sliding velocity, costing crucial time right from the start. You can bypass this limitation entirely by executing an Instant Waddle-Cancel immediately upon gaining character control.
To perform the launch, input a forward movement command for exactly two frames until the character's right foot initiates its first step animation. Immediately trigger a "Slide" command paired with a 5-degree lateral directional tilt. This sequence tricks the ground-friction calculator into applying slope acceleration values on flat starting terrain, instantly propelling your penguin to maximum sliding speed within milliseconds.
Input Timeline Breakdown
- Frame 1–2: Hold Forward (
WorStick-Up) to trigger the movement startup state. - Frame 3: Press and hold
Slidewhile nudgingDirection5 degrees left or right. - Frame 4+: Release
Forwardand sustainSlideto lock in top baseline velocity.
Executing the slide input too early (Frame 1) causes a static crouching halt, while executing it too late (Frame 5 or later) locks the character into a full walking animation, requiring a complete reset to retry the launch.
Phase 3: Surface Friction Navigation – How to Maintain Top Velocity Across Variable Ice Types
Maintaining speed across a level requires adapting your sliding style to three primary surface types: Powder Snow, Pack Ice, and Blue Glacial Ice. Each surface features a unique friction coefficient that alters your deceleration rate during belly-slides.
When transitioning from high-friction Powder Snow (friction coefficient $0.45$) to low-friction Blue Glacial Ice (friction coefficient $0.02$), you must use micro-hops to minimize surface contact. Initiating a low-altitude hop right before entering high-friction zones keeps your character airborne, preserving horizontal kinetic energy until you reach smoother ice.
Surface Characteristics and Traversal Rules
Powder Snow (High Friction)
- Strategy: Avoid continuous belly-sliding. Execute short, low-arc hops across the surface.
- Speed Loss: Up to 40% velocity reduction per second of direct contact.
Pack Ice (Standard Terrain)
- Strategy: Maintain standard belly-slides, using minor directional adjustments to set up jump angles.
- Speed Loss: Minimal velocity loss; serves as baseline terrain.
Blue Glacial Ice (Hyper-Low Friction)
- Strategy: Hold full belly-slide and disengage jump inputs. Allow natural surface acceleration to stack top speed.
- Speed Loss: Negative deceleration (generates natural momentum).
Phase 4: Vertical Reach Optimization – How to Execute the Belly-Flop Double-Jump Sequence
Reaching elevated shortcuts and high-tier fish pickups requires more height than a standard jump can provide. The Belly-Flop Double-Jump Sequence converts horizontal speed into vertical lift, allowing you to bypass platforming obstacles entirely.
To execute the technique, approach a ramp edge at top sliding speed and initiate a standard jump. At the exact apex of your upward jump arc, press "Slide/Flop" to align your character horizontally in mid-air, then press "Jump" within a 3-frame buffer window. The second jump input registers against the flop collision mesh, launching your penguin into an extended vertical trajectory.
Standard Arc:  [Launch] ----------> Low Apex ----------> Drop
Flop Sequence: [Launch] --> Flop --> Air Bounce Apex (+40% Lift) ----------> Extended Trajector
Timing is critical: executing the mid-air flop before reaching your jump apex limits horizontal distance, while executing it after your arc begins descending causes a stalled downward drop.
Phase 5: Thermal Gauge Balance – How to Manage Overheat During Extended Boost Drifts
Using active boosting or executing tight drift turns fills your penguin's Thermal Energy Meter. Allowing the meter to reach 100% triggers an overheating animation, forcing a 3-second recovery stun that destroys your current momentum.
To maintain continuous high speeds, manage heat buildup using a rhythm called "Pulse Boosting." Instead of holding the boost button down through long turns, apply short 0.5-second bursts interspersed with neutral straight-line slides. This technique keeps your Thermal Energy Meter safely in the 75–80% optimal operating zone without triggering an overheat penalty.
Thermal Management Playbook
- Downhill Cooling: Release active boost inputs when entering downhill slopes. Gravity will sustain your top speed while your thermal gauge cools down.
- Coolant Fish Integration: Route your movement to collect Blue Frost Fish, which instantly clear 30% of your accumulated heat bar.
- Airborne Thermal Freezing: Use airborne jump time strategically; the thermal meter freezes while off the ground, pausing heat decay and buildup until landing.
Phase 6: Boss Hazard Evasion – How to Use Invincibility Frames to Slide Through Shockwaves
Boss stages introduce large area-of-effect (AOE) shockwaves and falling debris designed to interrupt your movement flow. While jumping over these hazards works, it disrupts your ground-sliding vector and reduces your overall speed. Instead, use Invincibility Frame (i-Frame) Windowing to pass directly through incoming attacks.
The belly-slide animation grants 6 invincibility frames upon activation. To slide through an incoming boss shockwave, maintain your approach trajectory and press "Slide" right as the shockwave boundary touches your character's front collision box.
Step-by-Step i-Frame Execution
- Approach the incoming shockwave in a standard upright or neutral state.
- Track the hazard boundary until it is within 1 to 2 character-lengths of your penguin.
- Tap
Slideto trigger the startup animation, activating your invincibility frames. - Pass through the attack geometry unharmed while retaining your forward momentum.
Successfully dodging hazards using i-Frames awards a minor momentum boost, converting defensive maneuvers into speed-generating opportunities.
Phase 7: Dynamic Hazard Traversal – How to Convert Environmental Vectors into Speed Boosts
Late-game stages feature dynamic hazards such as high-velocity crosswinds and avalanche debris. Rather than avoiding these environmental forces, you can manipulate their vectors to gain additional forward speed.
When facing strong crosswinds that push your penguin off-course, angle your slide trajectory 30 degrees into the wind direction. This creates a "tacking" effect in the physics engine, converting lateral wind pressure into forward thrust.
Avalanche Debris Launch Setup
- Step 1: Position your penguin behind falling snow boulders, matching their downhill direction.
- Step 2: Angle your approach toward the trailing edge of a rolling boulder at a 15-degree incline.
- Step 3: Trigger a slide-jump right as you make contact with the back slope of the boulder.
- Step 4: Launch off the rolling object to gain elevated airtime and access high-level stage shortcuts.
Phase 8: Resource Route Integration – How to Collect Item Clusters Without Losing Velocity
Maximizing your end-of-stage score requires collecting item clusters like Silver Sardines, Golden Anchors, and Star Fish. Steering directly off your path to pick up individual items reduces average speed, making tight parabolic steering curves essential for optimal collection routes.
Instead of turning sharply toward off-path items, use drift curves and micro-adjustments to widen your collection radius while preserving forward kinetic energy.
Item Collection Tactics
Item TypePriority LevelOptimal Collection MethodSpeed ImpactSilver SardineLowDirect linear pass along main route0% (Neutral)Golden AnchorMediumShallow parabolic drift curveMinimal (<2% with drift cancel)Star FishHighMid-air belly-flop apex interceptionNet gain via air-boost trajectory
To gather wide item arrays, initiate a drift early along the inner arc of a turn. This motion sweeps your character hitbox through the cluster without forcing wide, speed-killing turns.
Phase 9: Advanced Wall Mechanics – How to Chain Wall-Skims with Downhill Slope-Dashes
In high-difficulty stages, narrow mountain passes allow you to execute Wall-Skim Slope-Dash Chains. Unintentional contact with vertical walls usually triggers a collision penalty, reducing your speed by half. However, intentional contact at shallow angles allows you to bounce off wall geometries to gain extra speed.
Approach vertical ice walls at a shallow 5-degree angle. The moment your character model contacts the wall mesh, press "Jump." This triggers a "Wall-Skim," reflecting your penguin off the surface without applying collision damage or friction penalties.
[Incoming Trajectory] ---> (5° Contact Angle with Ice Wall)
                                    |
                            [Wall-Skim Jump Input]
                                    |
                                    v
[Reflected Vector +15% Speed Bonus] ---> [Downhill Slope Dash]
Chaining a Wall-Skim directly into a downhill slope applies an immediate speed multiplier, launching your character into the downhill section at well above standard terminal velocity.
Phase 10: Endgame Execution – How to Master Avalanche Proximity Speed Caps
The final stage of Gugu Gaga Penguin features a chasing avalanche hazard that collapses the track behind you. This sequence includes a proximity mechanic: the closer the avalanche boundary is to your rear collision box, the higher your character's top speed cap becomes.
To set record completion times, maintain a close distance to the avalanche hazard to continuously trigger the proximity speed bonus throughout the final sprint.
Proximity Management Instructions
- Monitor your screen borders for a white frost vignette, which indicates active proximity to the avalanche boundary.
- When the frost effect appears, your penguin gains a passive 25% boost to acceleration and top speed limits.
- Chain continuous slide-cancels and wall-skims while maintaining this distance from the hazard.
- If the frost effect fades, tap your brakes briefly to let the avalanche catch up, re-engaging the top speed boost for the final stretch across the finish line.