The Architect of Victory: Advanced Strategic Engineering in Dota 2
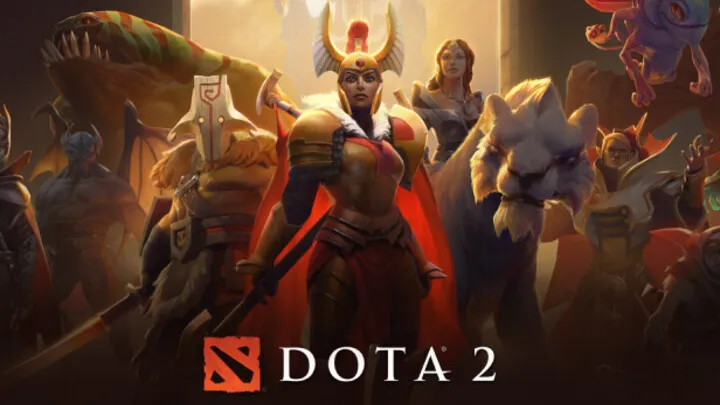
Dota 2 is less of a video game and more of a grand-scale intellectual war of attrition, played across a map that serves as a living, breathing chessboard. At its highest level, success is not determined by who has the fastest fingers, but by who possesses the most profound understanding of economic efficiency, spatial control, and the invisible math governing every interaction. To master Dota 2 is to master the "Efficiency Frontier"—the delicate balance between risk and resource acquisition. This guide moves beyond the basics of last-hitting and spell-casting to explore the deep technical systems that define the Immortal bracket and professional play.
1. The Draft as Architecture: Predictive Modeling and Win Conditions
In the professional meta, a Dota 2 match is often 50% decided before the horn sounds. The draft is a predictive modeling exercise where teams compete to build a superior "Engine." A successful draft must account for three pillars: Lane Dominance, Objective Scaling, and Teamfight Synergies. You aren't just picking heroes; you are selecting variables. If the enemy picks an Anti-Mage, you are forced to draft a "Tempo" engine—heroes that can end the game before the 30-minute mark—or a "Lockdown" engine that can ignore his mobility.
A deep-level tip for drafting is the "Flex Pick" strategy. By picking heroes like Kunkka or Tiny early, you hide your lanes. The enemy cannot counter-pick a hero that could be in three different positions. This psychological warfare forces them into "Safe" picks that are often suboptimal. Furthermore, you must identify your "Win Condition." Is it a 4-protect-1 strategy centered on a Medusa, or a "Split-Push" chaos engine led by Nature's Prophet? Every movement on the map must serve this architectural blueprint.
2. Lane Equilibrium: The Physics of Creep Manipulation
The first ten minutes of the game are a battle of "Creep Equilibrium." Understanding the "Pull" and "Aggro" mechanics is what separates a Legend player from a Divine one. By "Aggro-pulling"—right-clicking an enemy hero while standing near the creeps—you force the enemy creeps to move toward your ranged creep. This allows you to reposition the wave closer to your tower, providing a "Safety Buffer" where the enemy cannot easily initiate on you.
Advanced Laning Mechanics
- The Half-Pull: As a support, pulling the small camp into your wave is basic. The advanced move is the "Half-Pull," where you only draw two creeps into the camp. This keeps the wave near your tower but prevents it from being completely wiped, ensuring the enemy cannot dive you under the tower.
- Creep Blocking: The physics of hero hitboxes allow you to delay your creeps' arrival. In the mid-lane, a perfect block creates a high-ground advantage, giving you a 25% chance to dodge enemy attacks via the "Uphill Miss" mechanic.
- Aggro-Dropping: If you are taking tower fire, right-clicking a friendly creep instantly transfers the tower's aggression, a vital trick for "Tower Diving."
3. Economic Routing: Optimizing GPM through Stacking and Patterns
Gold Per Minute (GPM) is the pulse of a carry player, but it isn't just about hitting creeps; it's about "Farming Patterns." A high-level carry moves in a rhythmic cycle that maximizes the map's resources. This involves clearing the lane, moving to the "Large Camp," then the "Ancient Camp," and returning to the lane just as the next wave arrives. If your pattern is interrupted, your "Timing"—the moment you get your key item like a Battle Fury or Radiance—is delayed, shifting the game's momentum.
The Stack Economy
For supports, "Stacking" is the most powerful economic multiplier in the game. By pulling a camp out of its spawn box at the :53 or :55 mark, you double the resources available.
- Ancient Stacking: Triple-stacking Ancients for a hero like Alchemist can provide a 1,500 gold swing in under 60 seconds.
- Tri-Stacking: Using heroes like Shadow Demon or Naga Siren, you can stack three camps simultaneously using illusions or delayed spells.
- The Theft Risk: Never stack if your lanes are losing; you are simply providing a "Gold Bounty" for the enemy carry to steal.
4. Vision Dynamics: De-warding and the "Fog of War" Mindset
Vision is the only resource in Dota 2 that has no hard cap on its value. Warding is not about placing "Yellow Dots" on the map; it's about "Information Denied." A professional support doesn't ward high-ground cliffs exclusively; they ward "Transition Paths"—the invisible lines enemies must cross to move between lanes. This allows your team to predict enemy movements 10 seconds before they happen.
Counter-Intuitive Warding
- The Lane Ward: Placing an Observer Ward directly in the middle of a lane reveals "Teleport" animations. If you see the enemy mid-lane hero TPing to their fountain, you know you have a 20-second window to pressure the tower.
- The "Sentry" Blanket: In the late game, using Sentries to "Blanket" your own jungle is more important than warding the enemy's. This denies the enemy's ability to "Smoke of Deceit" into your high-ground.
- Hero Spacing: Use your own "Hero Vision" to scout. A hero standing in the trees provides "Passive Vision" that can be more deceptive than a static ward.
5. The Mid-Game Pivot: Power Spikes and Objective Priority
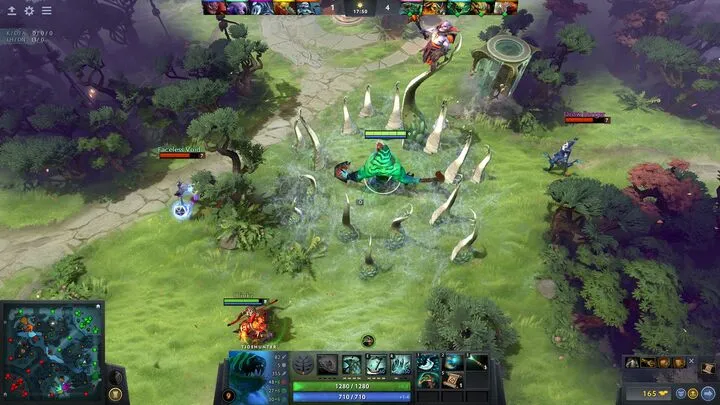
Between 15 and 25 minutes, Dota 2 enters the "Pivot" phase. This is when teams must transition from "Farming" to "Objective Taking." The key is identifying "Power Spikes." If your Offlane Slardar just finished a Blink Dagger, your team has a 3-minute window where you are significantly stronger than the enemy. If you do not force a fight or take a tower during this window, you have wasted your Slardar's economic advantage.
Priority during the pivot should follow this hierarchy: Roshan > Tier 2 Towers > Tormentors > Map Control. Roshan is the ultimate objective because the Aegis of the Immortal allows your carry to play with "Zero-Risk Aggression." A team that controls the Rosh Pit controls the game's tempo. If the enemy team is showing 4 heroes on the bottom of the map, you must instantly "Smoke" toward Roshan. Hesitation in the mid-game is the primary cause of "Throwing" leads.
6. Micro-Mechanical Excellence: Frame Data and Interaction Priority
Dota 2 operates on a "Server Tick" system. Every action has a "Cast Point" and an "Animation Backswing." To play at a master level, you must "Animation Cancel." By pressing the 'S' (Stop) key the instant a projectile leaves your hero, you cut the recovery animation, allowing you to move or attack again 0.1 to 0.3 seconds faster. Over a 40-minute game, this adds up to hundreds of extra attacks and dodges.
Interaction Hierarchy
Understanding "Spell Priority" is essential for teamfighting.
- Instant Disables: Spells like Hex (Lion/Shadow Shaman) have a 0.0 cast point. They override almost every other movement.
- Disjointing: Projectiles like Sniper's Assassinate or Sven's Storm Bolt can be "Disjointed" using Blink Dagger or Manta Style. The timing is a 0.1-second window.
- Debuff Immunity: The "Black King Bar" (BKB) no longer grants full magic immunity but "Debuff Immunity." You still take damage, but you aren't stunned. Knowing which spells "Pierce BKB" (like Fiend's Grip or Primal Roar) is the difference between life and death.
7. High-Ground Sieging: The Art of the "Slow Siege"
Taking the enemy's barracks (High-Ground) is the most difficult task in Dota 2 due to the "Uphill Miss" and "Vision Disadvantage" mechanics. Many games are lost because a winning team "Dives" the high-ground and gets wiped. The correct approach is the "Slow Siege." This involves using a hero with high building damage (like Terrorblade or Sniper) to chip away at the tower while the other four heroes stand behind them in a "Support Triangle."
The Glyph of Fortification is the enemy's primary defensive tool. When sieging, you must "Bait" the Glyph. Trigger the Glyph with a small amount of pressure, retreat, and wait for it to expire before committing your big Ultimates. Furthermore, prioritize the "Ranged Barracks" over the "Melee Barracks" if you only have a short window, as the ranged creeps provide more utility and are harder for the enemy to clear.
8. Itemization Theory: Adaptive Builds and the "Save" Meta
Itemization in Dota 2 is never static. Building the same items every game is a "Low-Skill Trap." You must itemize against the enemy's "Method of Initiation." If the enemy has a Legion Commander, your supports must rush a Linken's Sphere or a Lotus Orb to save the carry from Duel. If the enemy has high magic burst, a Pipe of Insight is more valuable than a luxury damage item.
The "Utility" Checklist
- Force Staff: The single most important "Save" item. It can push an ally out of Chronosphere or Riki's Smoke Screen.
- Ghost Scepter: Essential for supports against physical carries like Phantom Assassin.
- Nullifier: The "Counter-Item" for defensive items. It strips away Ghost Scepter, Glimmer Cape, and Force Staff buffs.
- Scythe of Vyse: The "Hard-Carry" late-game item. A 3.5-second Hex is the only way to kill high-mobility heroes like Puck or Ember Spirit.
9. Psychological Warfare: Managing the "Mental Fortitude"
Dota 2 is as much a test of temperament as it is of skill. The "Comms" and "Pings" are tools for coordination, but they can also be sources of "Tilt." Professional players practice "Minimalist Communication." Only share actionable information: "Rosh soon," "BKB ready," "Enemy smoked." Emotional outbursts provide no tactical value and actively reduce your team's "Processing Bandwidth."
Additionally, utilize "Information Misdirection." By showing a "Support" hero in a lane while the rest of the team is "Smoked" behind them, you create a "Gank Bait." The enemy sees a "Solo Support" and jumps in, only to be counter-initiated by five heroes. This "Psychological Trap" is the most effective way to break a stalemate in the late game.
10. The Ultra-Late Game: Buyback Management and Tier 5 Items
Once the game passes 60 minutes, it enters the "Ultra-Late" phase. Gold becomes irrelevant except for one thing: Buyback. You must never fight without "Buyback Status" ready. A single death without buyback at 60 minutes results in an immediate loss. The strategy shifts to "Attrition"—forcing the enemy to spend their buybacks while preserving yours.
Tier 5 Neutral Items (dropping at 60:00) are the game-breakers. Items like Apex or Mirror Shield provide stats that are equivalent to two regular items. You must coordinate your team to secure the "Neutral Tokens" immediately. At this stage, the game is won by the team that makes the fewest "Micro-Mistakes." A single mis-timed BKB or a failed "Manta Dodge" will end a 70-minute struggle in seconds.
Conclusion
Dota 2 is an eternal puzzle, a game where the ceiling for mastery is constantly rising. It demands a level of dedication that few other games require, but it offers a depth of strategic satisfaction that is unmatched in the genre. From the initial dance of creep aggro to the high-stakes buyback management of the ultra-late game, every click is a decision and every decision has a consequence. By mastering the invisible math of efficiency, the physics of spatial control, and the psychological nuances of team dynamics, you move beyond being a player—you become an architect of victory. The Aegis is waiting; play with intent, and let the math of the ancients guide your hand.
